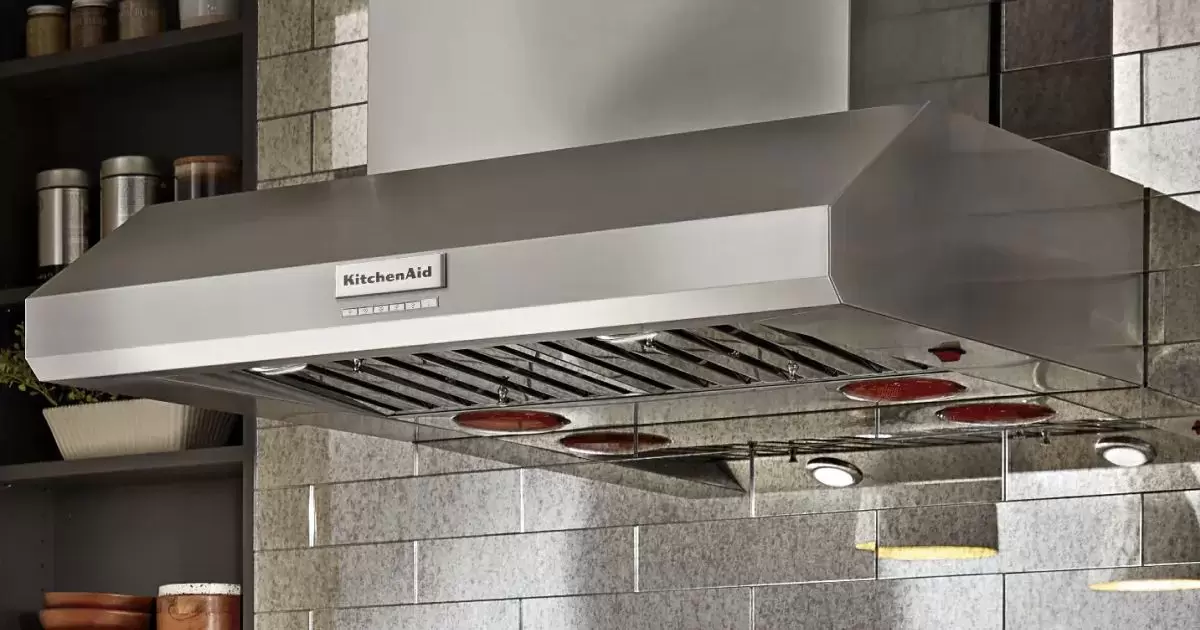
A stainless steel hood vent is an exhaust hood located above the cooktop or stove to do away with smoke, vapors and grease from the air. It wishes ordinary cleansing to preserve its shine and overall performance.
Do you need to discover ways to smooth your grimy chrome steel hood vent speedy and effortlessly? Following a few easy cleaning steps can help take away grease buildup and bring lower back the flicker with out too much effort.
Regular cleansing is important for a stainless-steel hood vent as grease and filth can building up through the years and affect its potential to extract air from the kitchen. With the proper cleaning products and a little elbow grease, you can have your vent gleaming once more in no time.
How Often Should A Stainless Steel Vent Be Cleaned?
To hold a stainless steel vent working properly, maximum professionals advocate cleansing it each 3 months. This cut-off ensures grease does not build up into thick layers that are harder to remove. However, those who cook daily may need to wipe it down weekly. After cooking especially greasy or smoky meals, give the vent a quick wipe. can you forge stainless steel?
This helps prevent messes from drying fully. for most light household cooks, inspecting the vent every few months and hand washing it twice a year will suffice. But vigorous use requires increased cleaning frequency to avoid grease issues developing.
How Does Grease Buildup Affect A Stainless Steel Vent’s Performance?
Grease buildup on a chrome steel vent can motive it to lose effectiveness over the years. When grease and dirt are left unattended, it makes the surface dirty and clogged. This approach the vent works more difficult to draw out smoke and odors from cooking. With a thick layer of grease obstructing air drift, it can not do its task properly.
The grease additionally attracts extra dust and debris to paste to it. This can further block air passing through the vent openings and tubes. More work has to be done cleaning if it is not maintained regularly. A dirty vent covered in a greasy film is not as efficient or hygienic as a clean shiny surface.
What Happens When Grease Is Not Removed?
If grease stays on the vent long term without cleaning, it turns rancid and smells. This unpleasant odor can spread to other areas in the kitchen. Grease stains may also be difficult to fully remove the longer they are left unaddressed. Caked on layers take more effort and stronger cleaners to dissolve.
Not removing grease also poses a fire risk. As it builds up inside the tubes and around the opening, it can ignite if overheated from cooking flames. Frequent Cleaning helps to prevent dangerous accumulation that could potentially lead to kitchen fires.
How Can Grease Clog The Vent?
Grease and cooking residue stick to the surface of a stainless steel vent very easily due to its porous nature. Small food particles pass through the opening but grease pools in cracks and crevices. Over many uses, this grease collects into larger deposits that block air flow out of the vent.
Areas like inside tubes tend to attract grease drippings the most due to their enclosed shape and more horizontal orientation. Without cleaning, it congeals into thick greasy films that completely clog pathways meant for smoke to exit.
Why Is Regular Cleaning Important?
Frequent cleaning helps preserve the function and appearance of a stainless steel vent. It removes any buildup before it becomes difficult to shift. A clean vent allows for optimum air flow to keep the kitchen fresh while cooking. Regular wipe downs also protect against grease fires from occurring inside the vent system.
Routine maintenance protects the stainless steel material as well. Dirt that sticks for too long may damage its shine over time. Harsh chemicals are needed less if grease and grime don’t accumulate in the first place with regular upkeep. This keeps the vent looking new for many years.
What Cleaning Products Work Best On Stainless Steel?
Stainless steel is very durable but still needs gentle cleaning. Warm soapy water is effective for routine cleanings. A spray of vinegar or lemon juice cut with water also works well. For tough grease, use a stainless steel safe degreaser or baking soda paste. Make a thick paste with the soda and apply to smears.
Always read product labels to ensure the cleaner is stainless steel safe. Harsh abrasives and chemicals may damage the vent finish over time. Natural cleaners are usually best. Avoid using anything with chlorine as it can cause rust. A microfiber cloth is ideal for drying to protect the luster.
What Ingredients To Look For?
When selecting a cleaning product, look for ones containing vinegar, lemon, or ammonia. These gentle acids help cut through grease without being too harsh. Baking soda is another excellent grease fighting addition that is non-toxic. Avoid anything with bleach or other strong chemical components not needed for light dirt.
Products specifically branded for stainless steel care typically list safe ingredients up front like citric acid derived degreasers. These remove messes without damaging the vent material. Natural cleansers are usually pH balanced to match stainless steel too.
What To Avoid On Stainless Steel?
Some common family cleaners are too abrasive or acidic for stainless-steel vents. Avoid the use of whatever with bleach, chlorine, or harsh detergents. Also steer clear of scrubbing pads or sponges with an abrasive side that could slowly wear down the finish. Comet, Ajax, Lime-Away and other gritty formulas are too strong.
Even vinegar can be problematic in concentrated form or if left on too long. Lemon juice in large amounts without rinsing too may cause eventual pits in the steel. Play it safe by keeping all solutions diluted and avoiding prolonged contact with the vent surfaces.
Natural Or Chemical – Which Is Better?
For most light cleaning jobs, using a natural cleaner on stainless steel is preferable than harsh chemicals. Vinegar, lemon juice, and baking soda are mild yet effective options. They break down grease without damaging the material in the process. Chemical degreasers may work faster but run the risk of corrosion with prolonged or careless use.
Natural cleaners are also better for the environment as they are non-toxic and biodegrade quickly. Using them whenever possible is an eco-friendly approach. Save stronger formulas for burnt on messes that require more degreasing power to shift. Water is the best natural cleaner and rinse of all.
How To Test Cleaning Products?
Before treating the entire vent surface, it’s best to try cleaning products in an isolated area first. Apply a drop in an unseen corner to check for reactions like corrosion, fading or pitting. Wait at least an hour to inspect. You can also spot test on scrap stainless steel pieces first.
This precaution ensures products will not damage the finish. Natural options are usually safer but durability varies between makers. Always spot check, use sparingly and limit contact time if harsher chemicals seem needed. With a little trial and error, you’ll find suitable cleaning methods.
How To Remove Stubborn Grease From A Stainless Steel Vent?
Sometimes grease builds up into thick layers on stainless steel vents. For these tough messes, special treatments are needed. Start by spraying a degreasing solution over spots. Use one formulated for stainless steel use. Let it sit for five minutes to break down bonds. Then scrub with a damp microfiber towel or soft brush. The degreaser dissolves grease for easy wipe off.
For really caked on buildup, apply baking soda as an abrasive paste first before degreasing. Mix to a thick consistency with just enough water. Scour surfaces with the gritty mixture packed on heavily soiled areas. Let sit a while before rinsing residue away under the tap. This two step approach breaks through any coating for a deep clean.
What Is The Best Way To Lift Grease?
The most grease cutting approach is usually a degreasing spray or gel designed for tough jobs. Look for active agents like citrus, vinegar or industrial solvents that penetrate deep down. Apply generously to problem patches, allow to work its magic, then wipe clean. Baking soda can also work as an included abrasive.
For baked on bits, a plastic putty knife or rubber scraper works well, especially if the area has soaking with degreaser first. Scrape, then scrub any remains away. Avoid metal tools that could scratch the vent finish. Once loosened, dried baking soda may also help scour with gentle abrasion.
When Should You Use An Sos Pad?
An SOS pad should only be used on stubborn spots when gentler methods fail. Its abrasive green wicking material acts like ultra fine grit sandpaper and can easily mar surfaces. Only use light pressure on small patches where other techniques proved ineffective.
Soak the pad in a degreasing solution before scrubbing. Go with the grain of brushed finishes, not against. Rinse thoroughly after as pad particles may remain stuck otherwise. Regularly check the affected areas after for any indications of scratching or dulling as a result.
What About Commercial Degreasers?
Commercial kitchen degreasers are very effective on greasy buildups but also harsh. Use sparingly, dilute with water as instructed, and spot test first. Wear gloves to avoid drying skin from toxic chemicals some contain. These work quickly so take care scrubbing around plastic or electronic vent components also.
Always follow with a warm soapy water rinse if using commercial formulas. Their strong fumes may linger if not thoroughly neutralized after application. Degreasers are best used as a last resort or on industrial equipment, not common appliances at home.
Any Home Remedies That Are Safe?
When possible, stick to milder solutions first like vinegar, lemon juice, or baking soda before resorting to caustic chemicals. Their natural ingredients cut grease safely without fumes or skin/vent risks. Baking soda can remove many deposits with just water as a paste. Allow time for the oven or vent insides to dry fully once cleaned to avoid residue buildup.
Tips For Cleaning Hard To Reach Areas Of The Stainless Steel Vent?
Vents have tubes and places grease can pool out of sight. To clean hard spots, try a bottle brush or plastic straw attachment on the end of a vacuum hose. Use short back-and-forth motions inside ducts to loosen residue. For glass panel areas, a plastic putty knife works well to reach under ledges.
Dampen stubborn spots with a degreasing spray. Let it sit five minutes before scrubbing. Twist or shape microfiber cloths into points to access tight corners and edges. Bendable plastic scrapers come in handy too for lifting layered grime without damaging. Vacuum loosened crumbs afterward.
How To Clean The Interior Tube Areas?
Drop a small brush or straw attachment on the end of a vacuum extension into vertical vent tubes. Twist and move it in short strokes to scrub inside walls. Spray a degreasing solution up first if possible for best results.
For larger ductwork, secure a cloth to the end of a broom handle or pole with a rubber band. Dip and wipe it along inside paths. Remove outer vent components if necessary to really reach all interiors for deep cleans annually.
What About Areas Under The Glass Panel?
Under glass panels that cannot lift out, use a plastic putty knife, flex spatula or old credit card edge to dislodge grime trapped below. Slide it between the vent surface and glass at an angle.
Sprinkle some baking soda first for abrasion if grease has built up. Let it sit wetting with a few drops of vinegar or lemon to fizz. Scour with your tool before rinsing all residues fully away. Pay close attention these hidden areas collect lots of grease over time.
Any Tricks For The Raised Edge Areas?
For track areas and raised edges, twisting a microfiber cloth works well. Bend it into a point, dip in cleaning solution, and rub firmly all around. Stubborn spots may need a plastic awl, unused toothbrush or other fine abrasive to scour grease pockets at a slant.
Plastic putty knives work too if flexible enough to wedge into grooves safely. Scrape with care not to mar surrounding finish. Rinse off baking soda or pre-treat edges with degreaser for extra efficiency when scrubbing detail areas.
Is It Okay To Submerge The Whole Vent?
Most experts do not recommend fully submerging vent components unless the manufacturer specifies it is safe to do so. Water could seep into electrical areas and cause shorting or rusting inside unprotected parts over time with repeated dunks.
When possible, spot clean problem patches individually for safety. Some glass or plastic panels may handle brief soaks to loosen caked on gunk however. Always dry completely before use, especially if electronic elements are attached to avoid potential damage.
Maintaining A Clean Stainless Steel Vent Between Deep Cleans
Regular wipe downs are key to keeping accumulated grease and grime from building up. Simply dampening a microfiber cloth with warm water works for light daily messes. For oil splatters, mix a spray of water with a few drops of lemon juice or vinegar in a spray bottle. Mist and wipe clean weekly to maintain shine.
Heavy cooks may need to spot clean vent surfaces after each use. While still warm is best to lift oily splatter before it dries fully. Paper towels work for this or use dry cloths for wiping away any loose crumbs around openings or edges.
What Is The Easiest Way To Wipe Down The Vent Weekly?
The easiest way is a pre-moistened all-purpose microfiber cloth. Run it under warm water, wring partially dry, then wipe down vent surfaces in straight motions. This picks up light grease and fingerprints without harsh chemicals needed.
No-rinse spray cleaners made for stainless steel also work well in a pinch. Spritz onto cloths versus directly onto vents. Buff to a shine using gentle wiping motions. Dispose of cloths after to avoid residue buildup in laundry.
Any Special Considerations After Cooking?
While cooking greasy or smoky foods, turn on the vent to high and open windows to prevent any mess from sticking. Right after a splattered meal, wipe surfaces down while still warm. Heat helps grease glide off effortlessly.
Pay close attention to edges, corners, crevices and under glass or plastic panels that collections love. Scrape off any larger fallen bits first before wiping. For small spills, paper towels pressed to soaking spots work very well at mopping up messes.
How To Prevent Grease Buildup In The First Place?
Reducing splatters in the first place is key. When possible, cook with lids on pans and turn down heat for simmering motions that bubble less. Use pans the right size for elements to avoid boilovers.
Wipe up spills on and around the vent promptly. Keep a small brush for edges and nozzle areas handy. Frequent light cleaning is easier than occasional deep scrubbing. Cleaning between uses helps splatter wipe away easily versus bakes on layers.
Signs It’s Time For A Thorough Stainless Steel Vent Cleaning
Some signs include: visible grease buildup, smears that won’t come off with wiping, clogged air flow making fans work harder or vents less effective at smoke removal. Dull or stained looking surfaces, especially under glass or ledges also mean a deep clean is due.
If routine cleaning is not keeping up anymore, it’s time for the full degreasing treatment using appropriate products discussed earlier. Focus on all enclosed areas getting thorough scrubbing attention during maintenance cleans.
| Step | Action |
| 1 | Gather supplies (cleaner, cloth, towels) |
| 2 | Wipe down surfaces with all-purpose cleaner |
| 3 | Rinse with damp cloth and dry completely |
| 4 | (Optional) Polish with glass cleaner for shine |
| 5 | Scrub greasy areas with degreaser cleaner |
| 6 | Maintain every 2-3 months to prevent buildup |
FAQs:
How do you clean a greasy stainless steel cooker hood?
Use a degreasing cleaner or dish cleaning soap and water. Scrub with a non-abrasive sponge or cloth and rinse thoroughly.
What’s the best thing to use to clean stainless steel?
All-reason stainless steel purifier is nice. Glass purifier or white vinegar also can paintings properly. Avoid harsh abrasives.
Can you use vinegar on stainless steel?
Yes, white vinegar is mild and safe for stainless-steel. Mix half vinegar 1/2 water and wipe down with a microfiber cloth.
How do you clean a stainless steel exhaust fan filter?
Remove filter out and hand wash in heat water and dish cleaning soap. Rinse nicely and allow air dry completely earlier than replacing.
Can you polish a stainless exhaust?
Yes, use a chrome steel polish or vehicle polish and a tender material to buff out mild scratches and repair shine.
How do you polish stainless steel exhaust tips?
Same as above, observe polish with a gentle material and buff in circular motions until shine returns to exhaust hints.
Conclusion:
Keeping your stainless steel hood vent clean is vital for keeping a clean and healthy kitchen surroundings. By following the stairs mentioned in this text, you could successfully put off cussed grease, dust, and odors out of your vent hood. Remember to continually use moderate detergents and avoid harsh chemical substances that can damage the stainless-steel floor.
Additionally, everyday cleaning now not most effective improves the appearance of your kitchen however also prevents the accumulation of flammable residues, decreasing the risk of capacity fires. If you are nevertheless unsure approximately a way to easy a stainless-steel hood vent successfully, do not hesitate to seek advice from a expert cleansing provider or the producer’s recommendations for specific hints.
With proper care and protection, your stainless steel hood vent will stay a beautiful and functional centerpiece in your kitchen for years yet to come. How to clean a stainless steel hood vent? Following the detailed steps supplied, you may hold your hood vent spotless and ensure premier performance.